Contents:
1.Overview of the Application
1.1Product Description
Templates generator Application will help you to generate the template and/or test index, based on your data in the Elasticsearch index
1.2Key Features
- Template generation
- Index with mappings and settings generation
- Compare generation results to the existing template and update it.
- Add the lowercase normalizer to the all-keyword fields
1.3System Requirements
- Java 8+
2Installation and Configuration
2.1Download
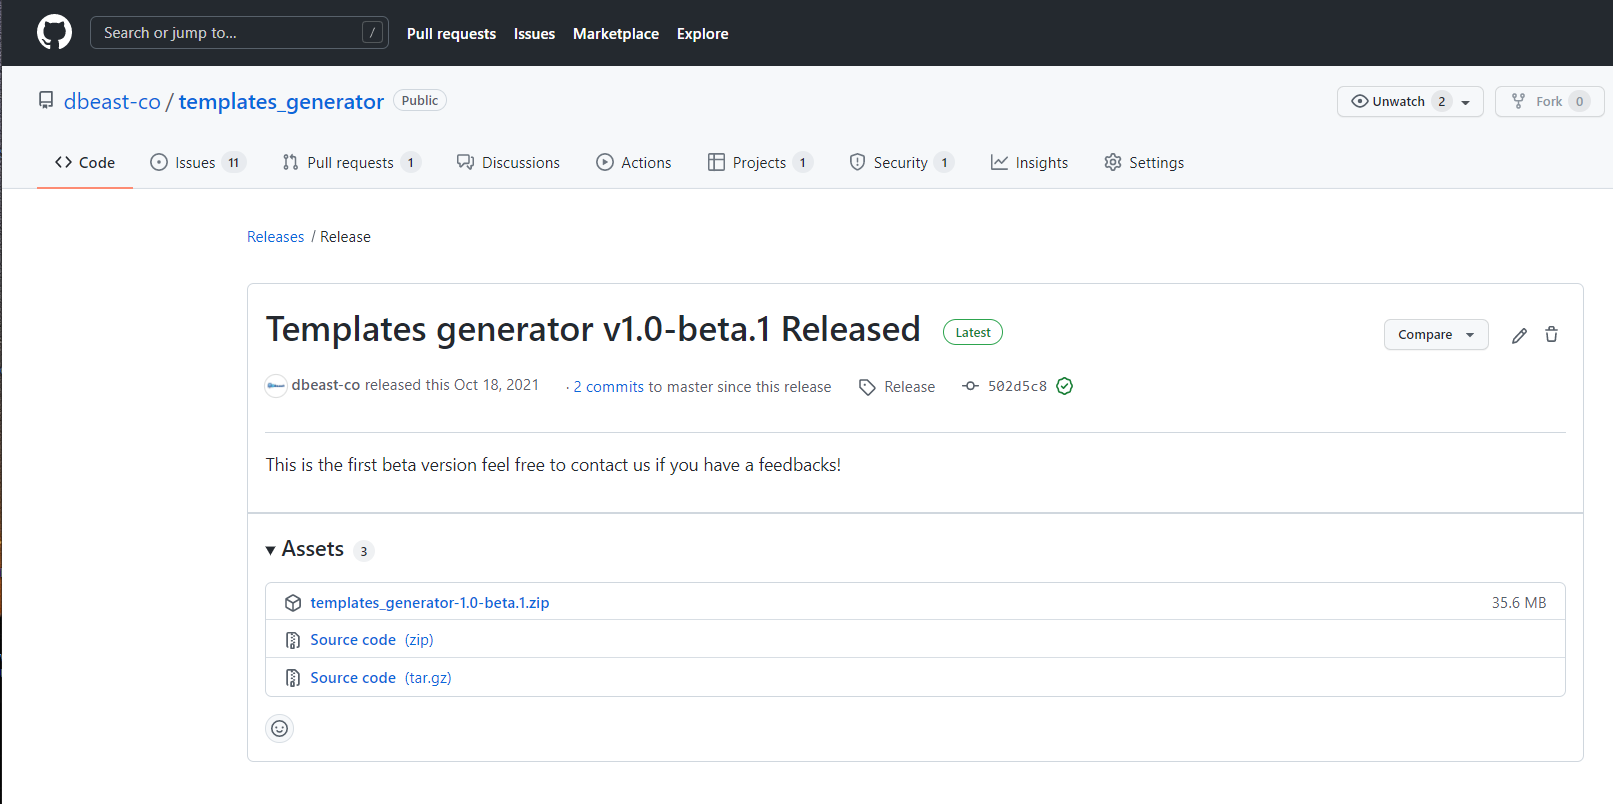
You can download the application from our release in the GitHub repository:
https://github.com/dbeast-co/templates_generator/releases
2.2Installation
In order to install the Application, you need to download and unpack template_generator.zip file on your machine.
For the Windows- 1.Run file template_generator.bat with path to config file as argument. The example of the config file, you can find in the config folder.
- 2.Run file reindex.bat
- 1.From the application home folder: chmod +x template_generator.sh with path to config file as argument. The example of the config file, you can find in the config folder.
- 2../template_generator.sh
3.Application Usage
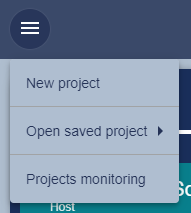
Main drop-down menu at the top left corner leads to 3 pages: “New project”, “Open saved project”, “Projects monitoring”.
3.1Projects Monitoring
First and main page is a general monitor of all saved projects. You can see their status and details or delete any of unwanted or irrelevant projects.
At the first run, the page will appear with empty fields:

When you will have several projects performed, your Project Monitoring page will show the details and possible actions.

You can edit the project, delete it, or download project related materials. You can download separately indexes, templates, logs, or everything together.
The “Status” column has color-coded options which correspond to standard Elasticsearch classifications:
- Red – FAILED
- Green – SUCCEDED
- Yellow – ON FLY
- Grey – NEW/STOPPED
3.2New Project
In order to start a new project, you need to choose “New project” from main drop-down menu.
This will redirect you to “Project settings” page.
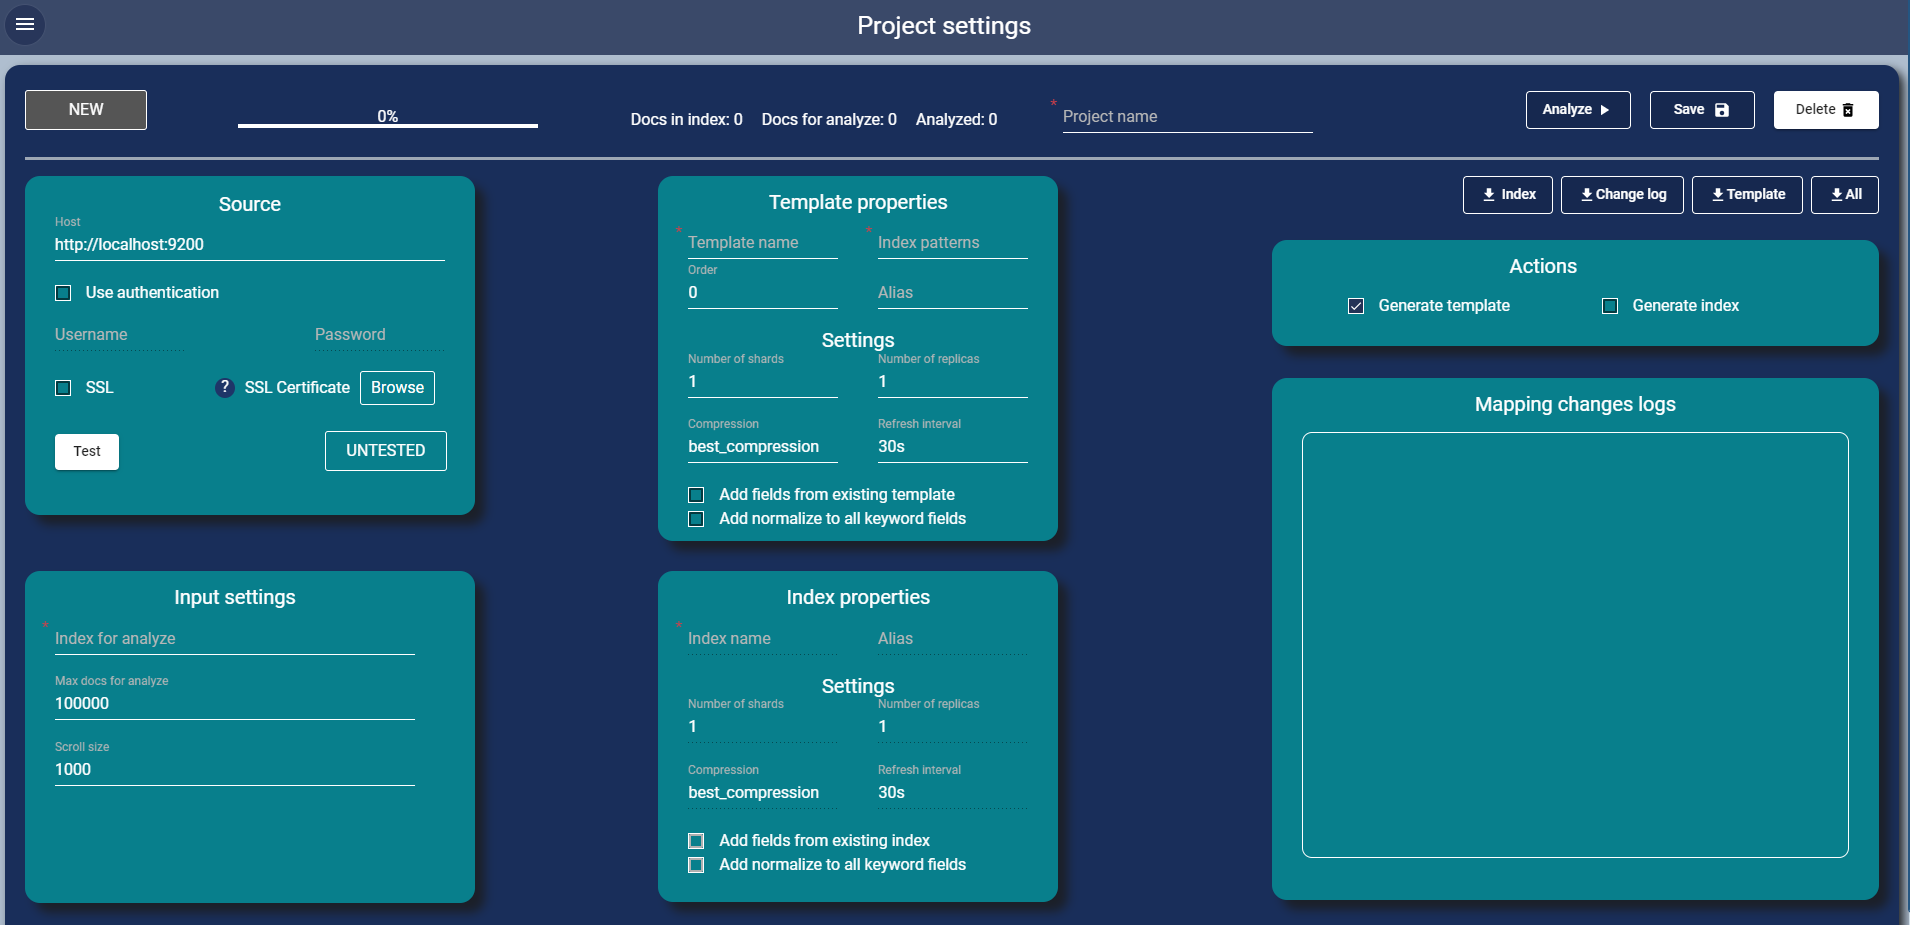
Fields marked * are mandatory. The rest of parameters are chosen according to your needs and project configuration requirements.
3.2.1Source
First step is to indicate Host and set basic parameters. The Applications gives opportunity for user authentication and/or to include SSL certificate, if required.
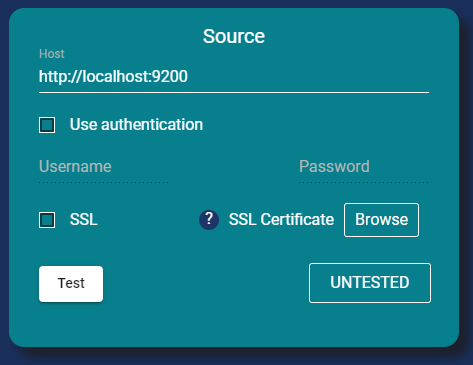
- a.Host may be in format: http(https)://__HOST_OR_IP__:PORT
- b.If you have a need for user authentication, you may mark the checkbox “Use authentication” and define the username and password.
NOTE: The Application doesn’t save your passwords in the configuration files, so after application restart, you’ll require to provide the password again.
- c.If your cluster supports the secure connection (https), you have to mark the “SSL” checkbox.
If you provide the SSL certificate, it will be used for secure connection to your cluster. Otherwise, the Application will set up connection to ignore SSL verification.
- d.In order to test connection with your Elasticsearch cluster press “Test” button. When testing process will finish you receive the cluster status.
The status button can appear in 3 colors depending on test result: Red/Yellow/Green. Those are standard Elasticsearch cluster statuses.
3.2.2Input settings
You need to insert the name of your index or index pattern in the required “Index for analyze” field.
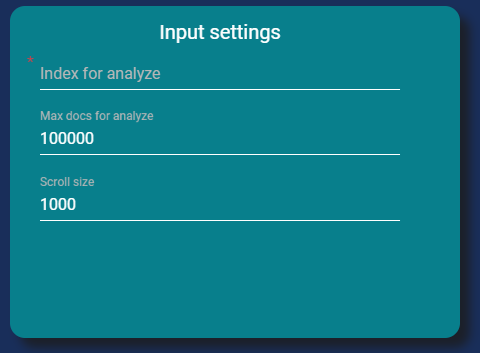
You can choose maximum number of docs for analyze. Thus, you are limited only to the number you indicated, or to the actual number of docs there are. In “Scroll size” filed you can indicate the desired size of information bulk to be analyzed.
The default numbers appearing automatically in those fields, are representing the most common and best practice only.
3.2.3Actions

By choosing one of the Actions options you can generate a ready template or a ready index. At the end of the process, you will receive a whole file with all the details.
3.2.4Template properties
In “Template properties” settings fields marked * are mandatory. Here as “Template name” you need to insert the future name of the template to be generated.
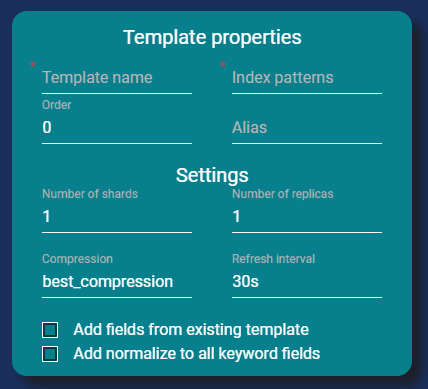
All “Settings” to be filled are standard Elasticsearch settings. The settings parameters have default values which can be altered according to your Elasticsearch parameters. Indicated Compression and Refresh interval values are representing the most common and best practice only.
Add fields from existing templates
This setting essentially means that you are taking existing template and compare it to the one to be generated. So, in this case the Application is taking an existing template and performs additional actions to it.
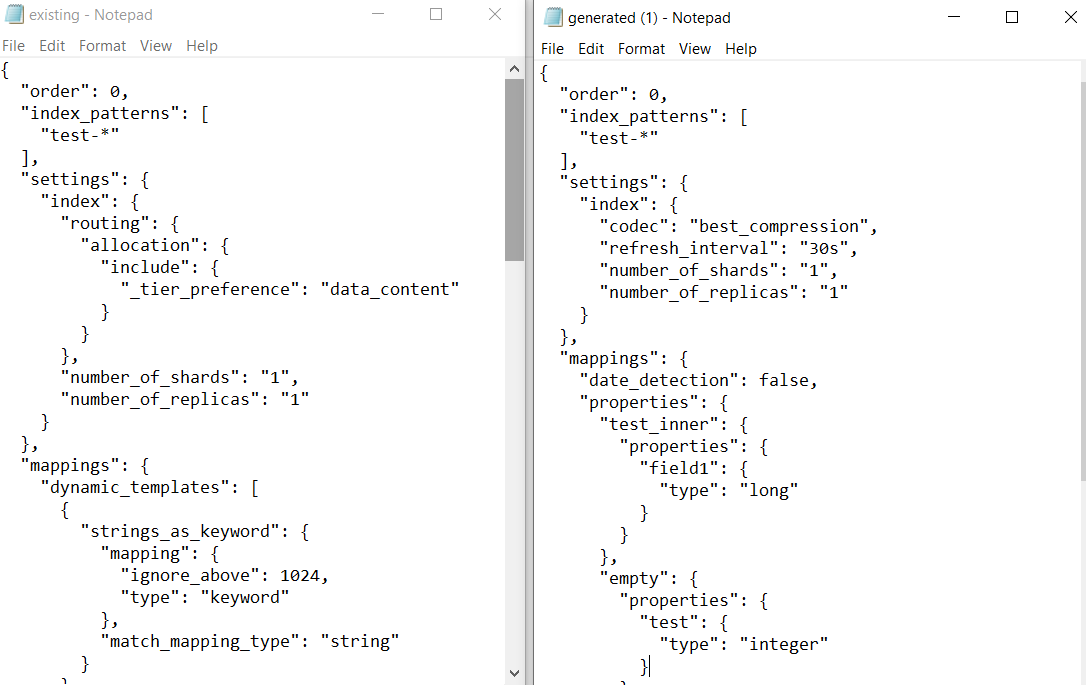

Choosing “Add filed from existing templates” checkbox extends the table and provides more parameters to enter:
“Add all fields” – take all fields from existing template and add them to the generated template.
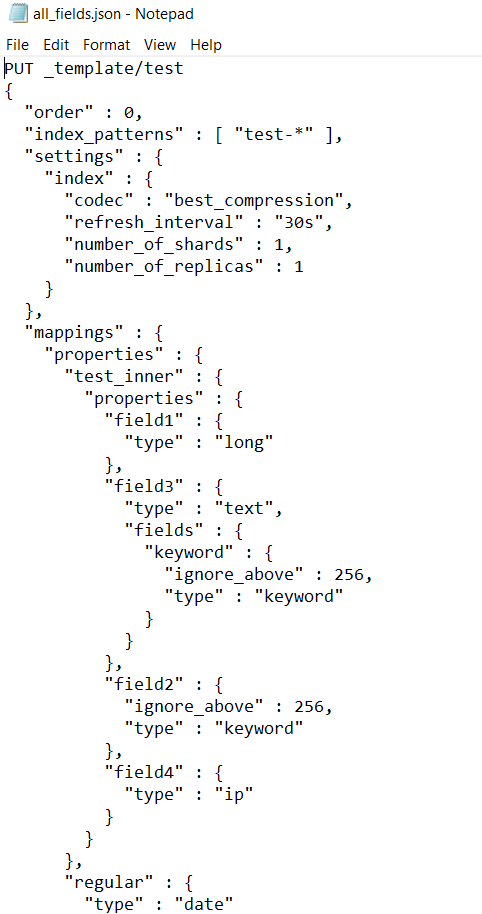
“Add only used top level fields” – top level fields of a file. For example:
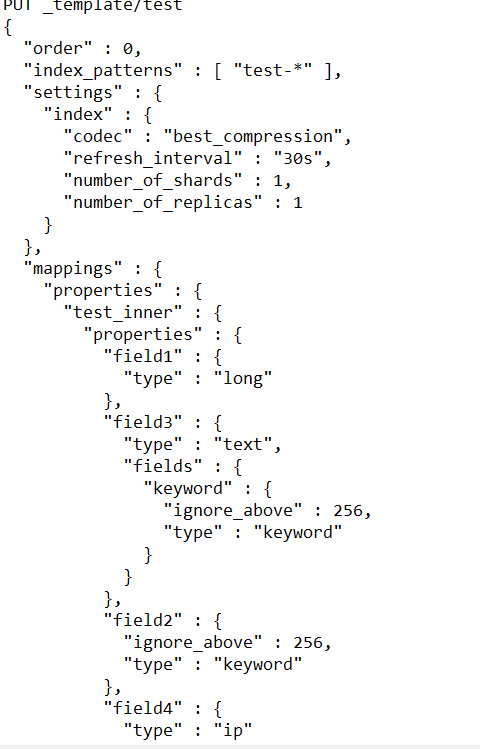
You can choose only one of those two checkboxes (“Add all fields” or “Add only used top level fields” as they are mutually exclusive). Other settings described below can be added upon your choice.
Replace existing field types – fields from existing template will be replaced in the generated template.
Add settings – adds index settings from existing template to generated template in addition to new settings of generated template.
Add dynamic mappings – adds dynamic mappings from existing template to generated template.
Generate dedicated template – he application compares generated template to existing one, and generates only those fields that are not present in existing template. This parameter helps to avoid duplications.
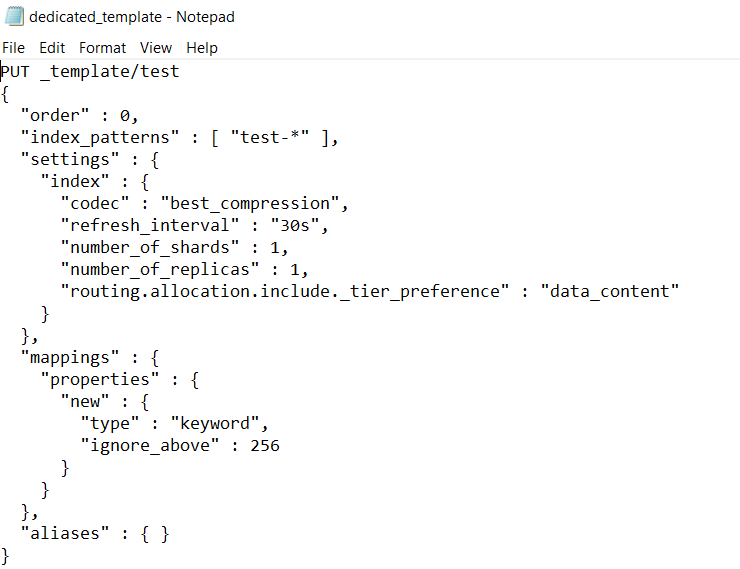
Ignore type conflicts – in the case of conflicting field types, the Application will not show it in the log.
Add normalize to all keyword fields

By choosing this checkbox you can add lowercase normalizer for all fields that are defined as keywords.
3.2.5Index properties
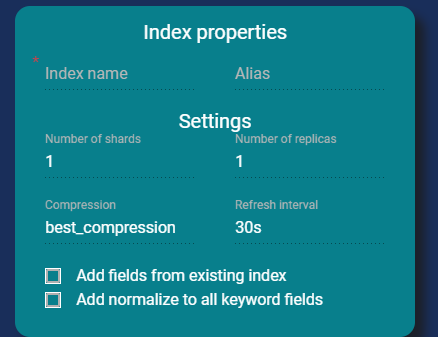
Here you need to insert Index name and settings. Settings in this field are essentially similar to corresponding settings of Template properties.
3.3Project Admission
When all settings are indicated, before pressing “Analyze” button there is a need to press “Save”. You will receive an approval in the lower right corner of the page:

When everything is ready, you can press “Analyze” button and you will see in the top left corner indication of started process (“ON FLY”)
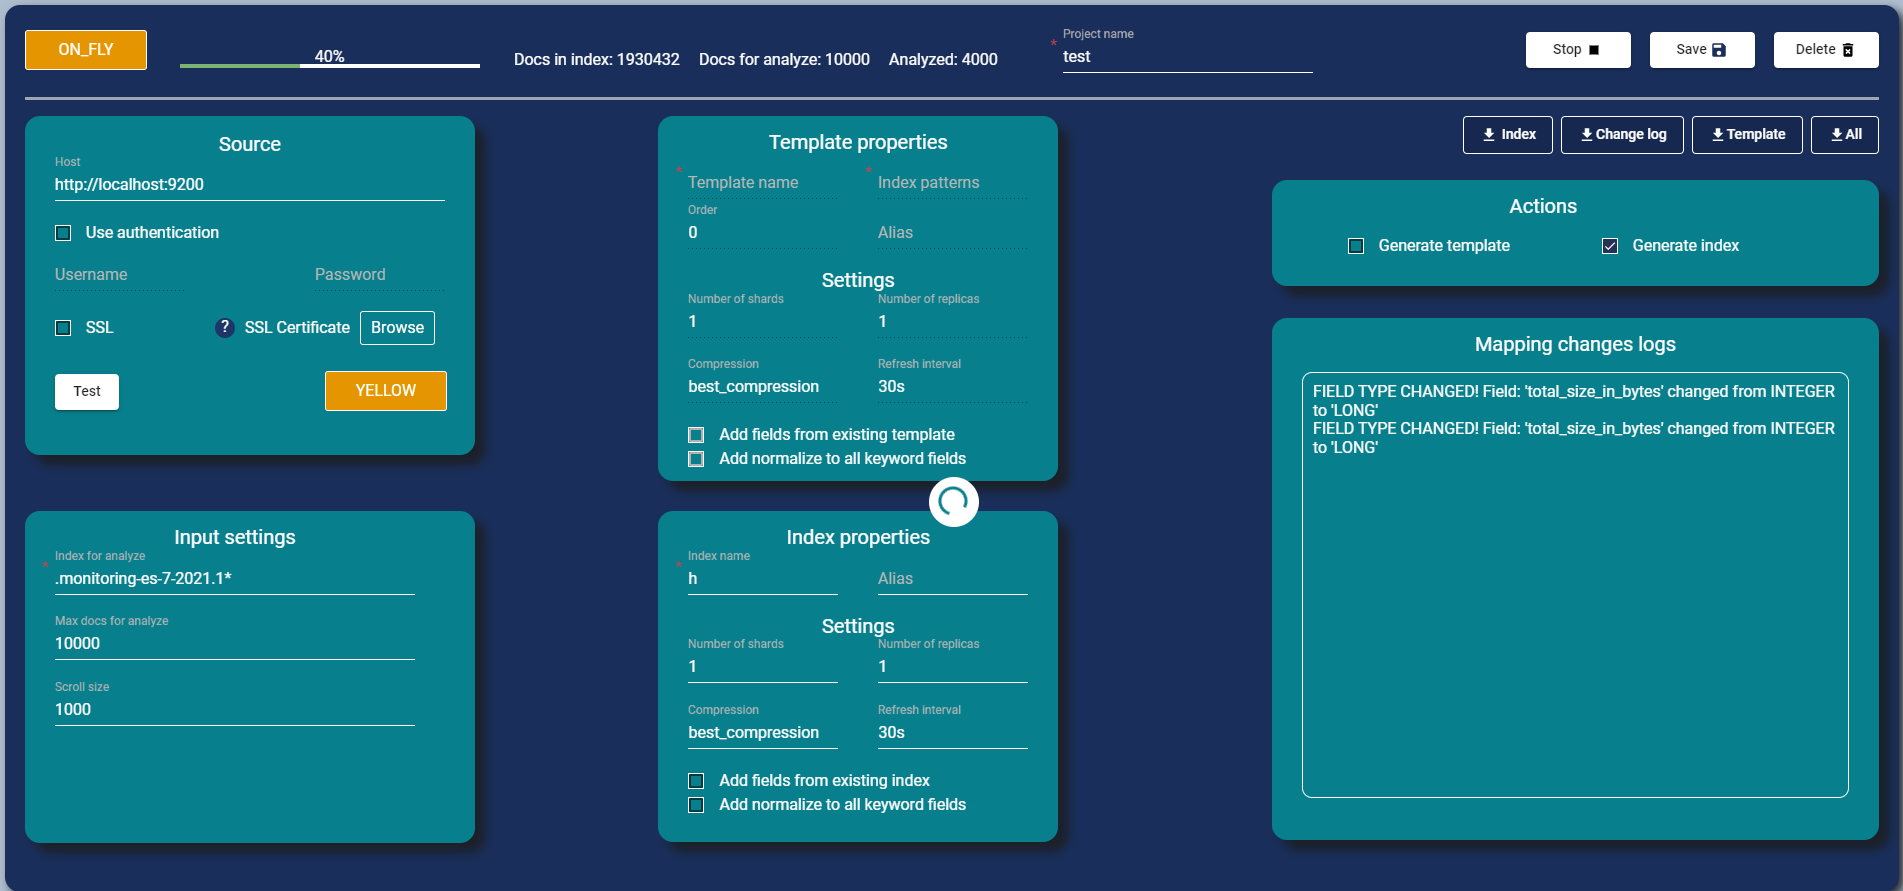
Throughout the process in “Mapping changes logs” section you will see results of changes made.
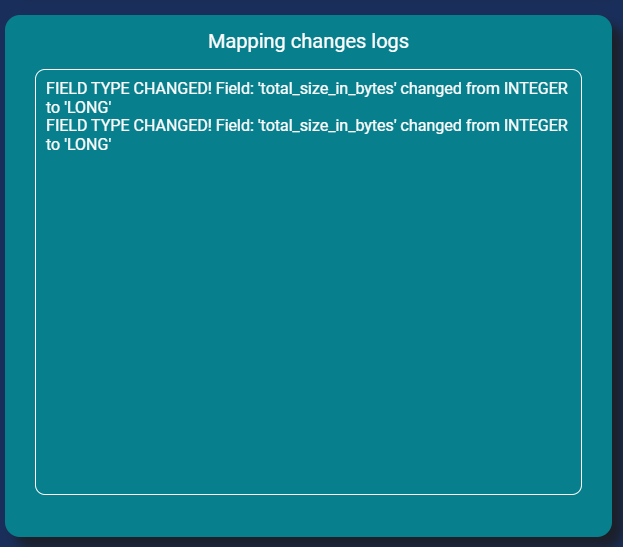

Status and progress of the project you can see at the top left corner of the page.

There you can also see the number of indexed documents. Or “Stop” the whole process.
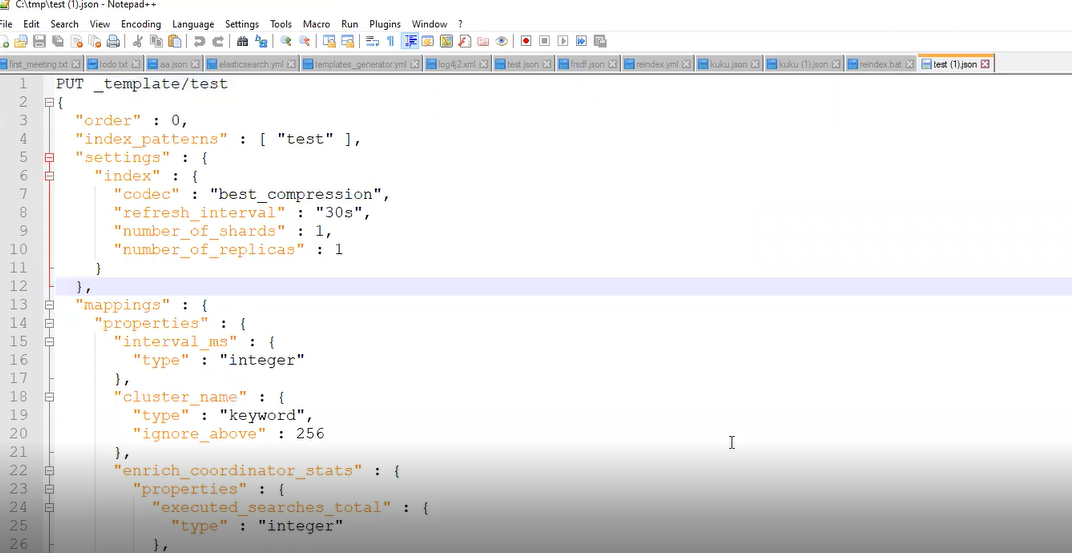
At the top right you can find download options for the results depends of the selected actions. You can download parts separately or as one file.

You will receive a file like:
3.4Open Saved Project
By picking this category in the main menu, you will go directly to the Project Monitoring page of a specific project chosen.
4.Standard Use Cases
Case 1:Analyze an index with non-consistent data.
Task:You have a massive index with several of log types and many fields.
Setting page example: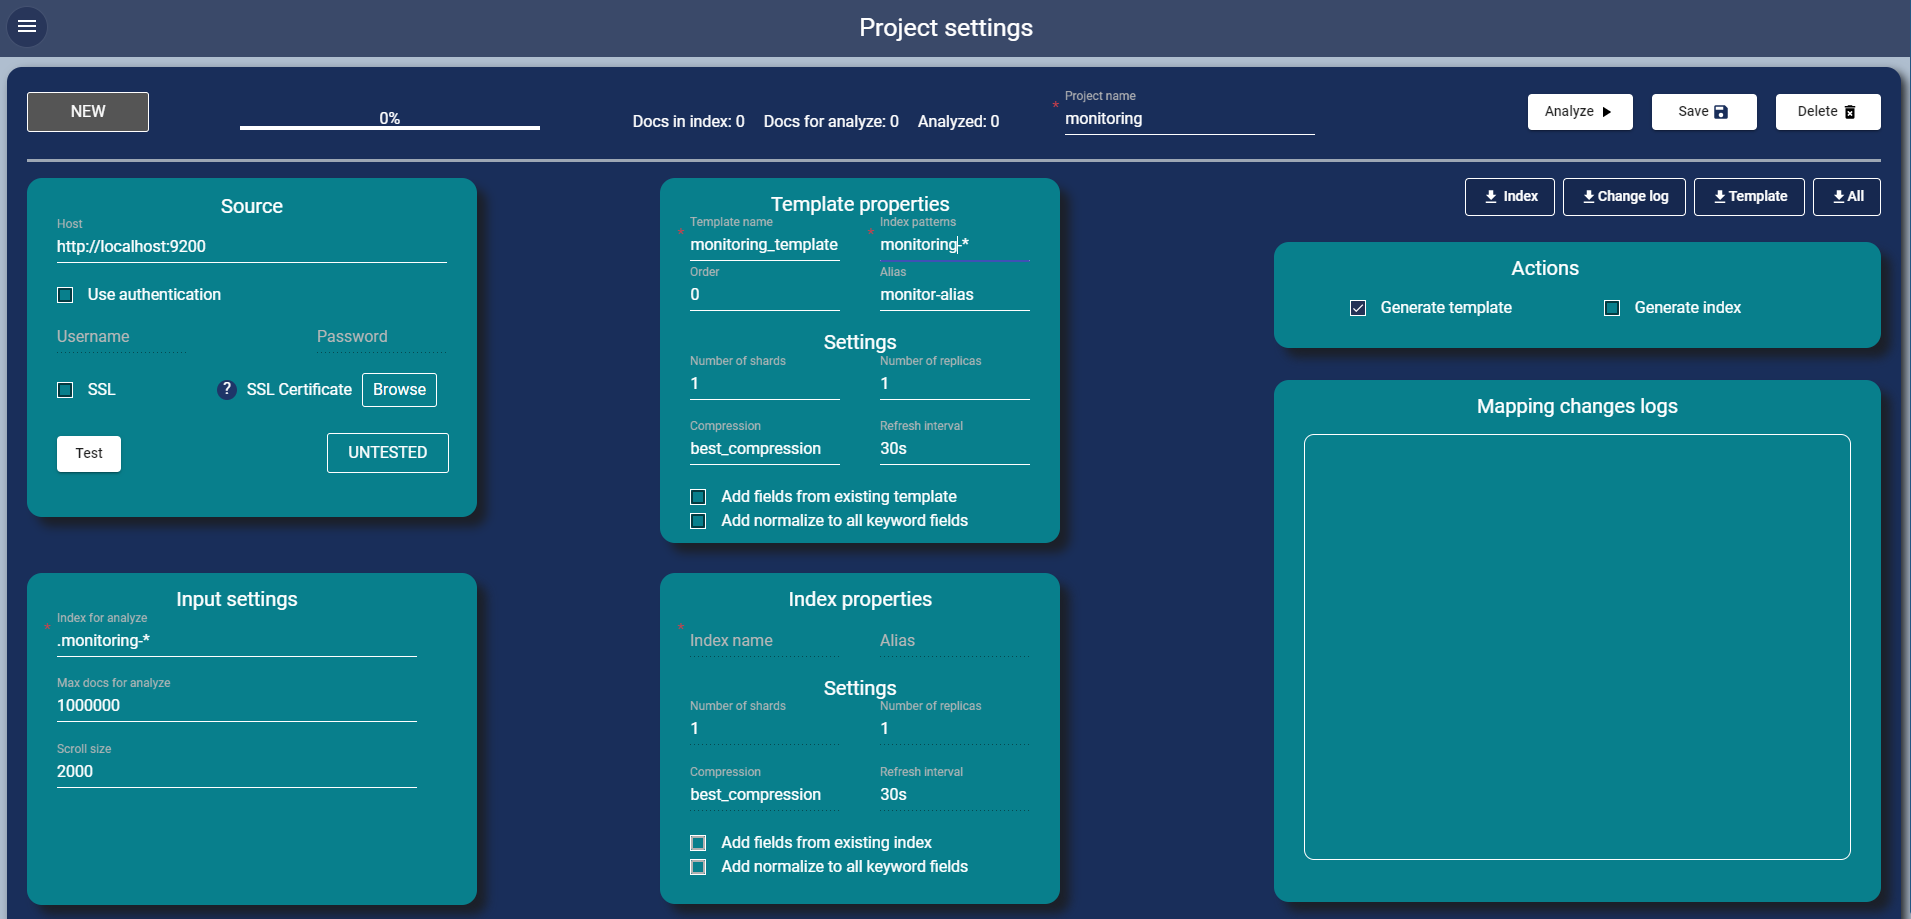
- 1.Set project name
- 2.Setup source
- 3.Test connection with your cluster
- 4.Define index for analysis
- 5.Define number of docs as 1000000 (in the case of inconsistent data we need more documents, because of different data types)
- 6.Set scroll size to 2000 (if you have a massive cluster, you can increase the scroll size to 5000)
- 7.Write name of the template, as you want it will be called in the Elasticsearch
- 8.Write index pattern for which you will use the template
- 9.Write index alias (if required)
- 10.Change shard number and all other index settings as required
- 11.If you need index for test purposes, you can mark the "Generate index" and fill index properties similar to the template’s properties
- 11.Press “Save”
- 12.Press “Analyze”
- In “Changes log” section you can see changes in the field types (you also can download it by pressing “Download changelog” button).
- When application will finish the process, you can download the template and/or index
- Copy the template/ index from the downloaded files to dev tools in Kibana and run it
- You can try to reindex existing data to the new index for testing the mapping correctness
Case 2:Analyze index and compare with existing template.
Task:You have an index, which is supposed to be compatible with ESC template. You have this template in your cluster. You want generated table to contain only usable parts of template. For example, you have data from rabbitmq, but you have more metrics than the ECS contains.
Setting page example: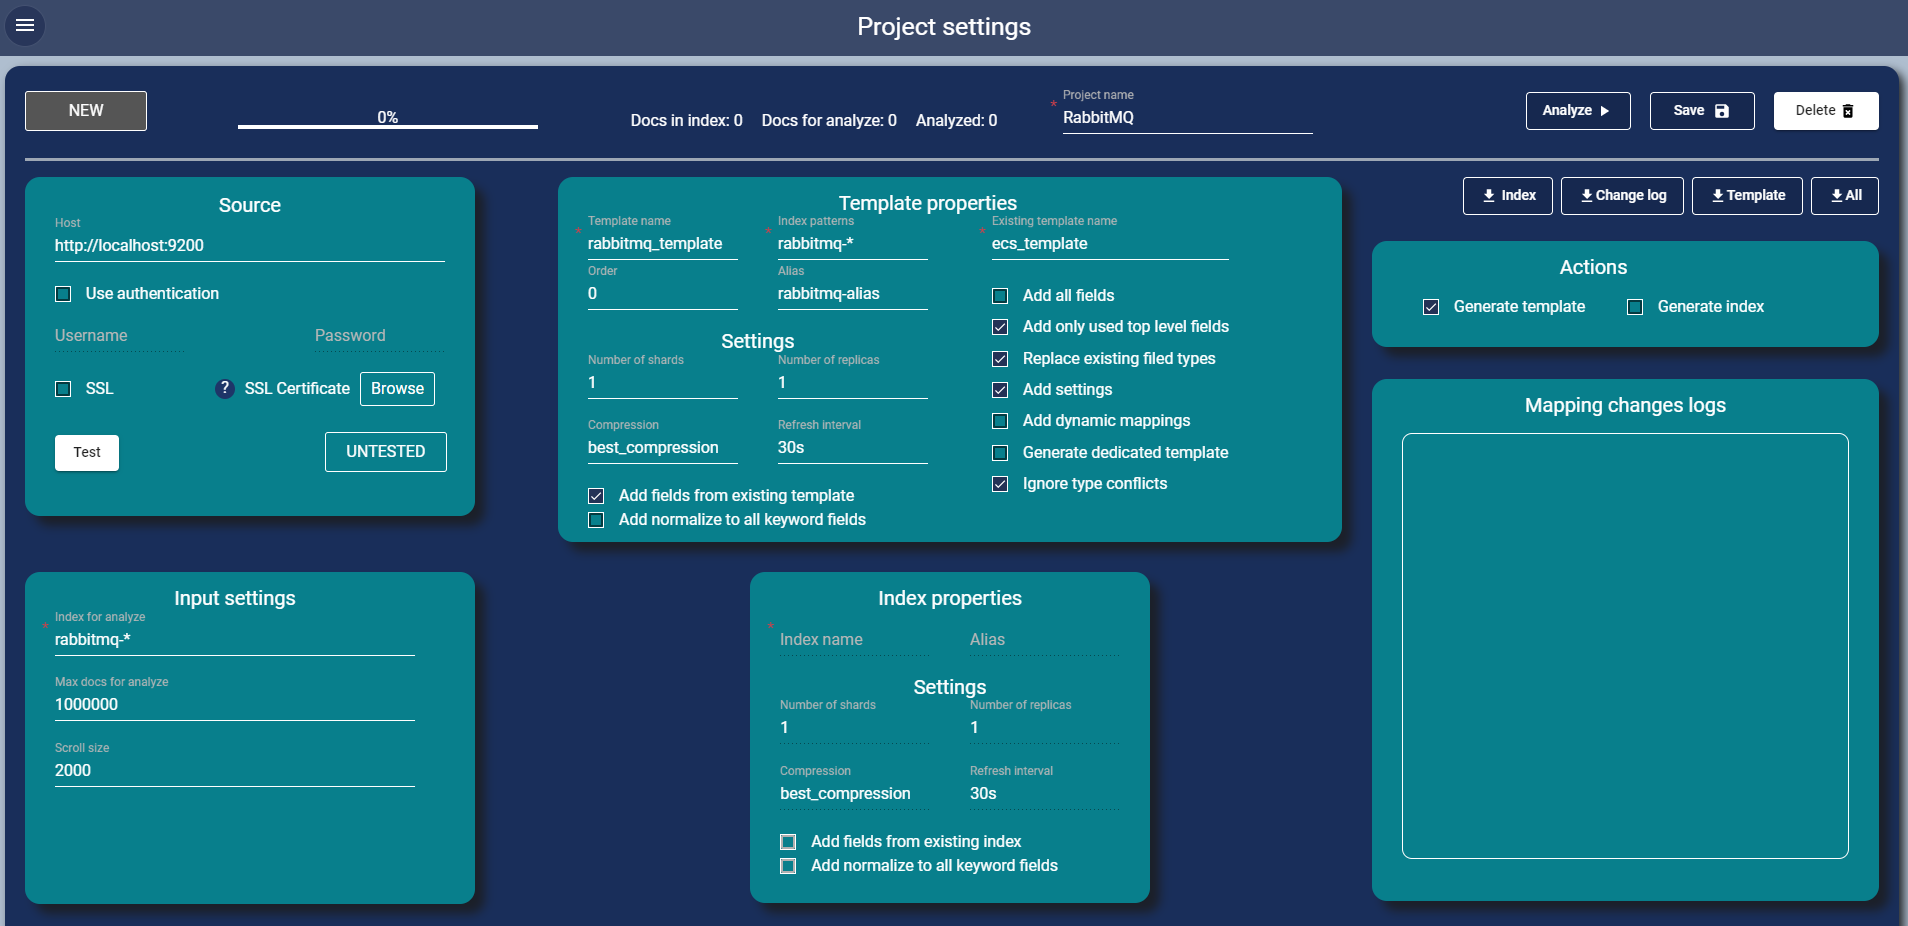
- 1.Set project name
- 2.Setup source
- 3.Test connection with your cluster
- 4.Define index for analysis
- 5.Define number of docs (you can leave default values, or change them)
- 6.Set scroll size (you can leave default values, or change them)
- 7.Write name of the template, as you want it will be called in the Elasticsearch
- 8.Write index pattern for which you will use the template
- 9.Write index alias (if required
- 10.Change shard number and all other index settings as required
- 11.Mark “Compare with existing index” checkbox (this will open additional part of the configuration window)
- 12.In this window mark "use root level..." (this will add all fields from the rabbitmq, even if you haven't them in your data)
- 13.Mark “Replace fields” (this will change field types in the template, that generated by application to the fields from the template)
- 14.If you need the existing template settings and dynamic mapping mark them too.
- 15.If you want to receive an error in case of incompatible data types in the generated and existing template (for example IP and date), unmark “Ignore failures” checkbox
- 16.If you need the index for tests, you can mark "Generate index" and fill index properties similar to templates properties
- 17.Press “Save”
- 18.Press “Analyze”
- In “Changes log” section you can see changes in the field types (you also can download it by pressing “Download changelog” button).
- If there are incompatibilities between generated and existing template, you can download it
- Check the generated template and if some fields do not look optimal - change them
- Copy the template/ index from the downloaded files to dev tools in Kibana and run it
- You can try to reindex existing data to the new index for testing the mapping correctness